

10 Best Home Coffee Bar Ideas for Every Kitchen?
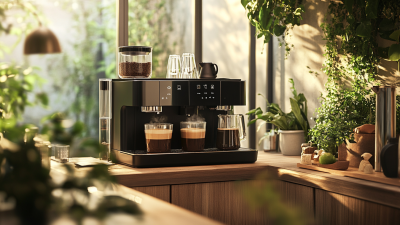
A Home Coffee Bar can transform an unused kitchen corner into a practical daily ritual. It does not require a restaurant-grade machine or a large renovation. A narrow shelf, warm lighting, and carefully chosen tools can create a welcoming station within a small apartment.
Coffee educator and author James Hoffmann has said, “The best coffee is the coffee you enjoy drinking.” That idea keeps design grounded. Your coffee bar should match your habits, budget, and available space. A pour-over setup may suit someone who enjoys quiet mornings. A compact espresso machine may work better for fast weekday drinks. Neither choice is automatically superior.
This guide explores 10 Best Home Coffee Bar Ideas for Every Kitchen, from floating shelves to built-in cabinets. Each idea considers storage, workflow, cleaning, and visual balance. Expect practical details, such as placing mugs near the brewer and keeping beans away from heat and sunlight. Small choices matter.
A ceramic tray can prevent spills. An airtight container can preserve freshness. Open shelving looks attractive, but it can collect dust. That part is easy to underestimate. Some kitchens may need more closed storage than display space.
The best setup is not always the most photogenic one. It should feel easy at 7 a.m., even when the counter is crowded. These ideas offer inspiration, but your routine should make the final decision.
Assess Kitchen Space, Workflow, Lighting, and Utility Access
10 Best Home Coffee Bar Ideas for Every Kitchen?
A useful coffee bar begins with an honest assessment of kitchen space. Measure the counter width, cabinet height, and walking clearance before buying storage. Leave enough room for a kettle, grinder, and serving cup. A narrow shelf may look efficient, but it can make daily preparation awkward. My first setup looked polished and felt cramped. That mistake changed how I plan small stations.
Workflow matters more than decoration. Keep beans, tools, and cups within one easy reach. Place preparation equipment near the water source, but avoid blocking the sink or main cooking area. Utility access deserves careful attention. Check outlet locations, cord length, and ventilation around heated appliances. Do not overload one outlet with multiple high-wattage devices. A qualified electrician should handle any new wiring or outlet changes.
Lighting can quietly determine whether the space works. Use bright, even task lighting over the preparation surface. Warm ambient light can make the corner feel inviting, yet it may hide spills or fine grounds. Under-cabinet lighting often reduces shadows on narrow counters. Test the station in the morning and evening. Notice glare, loose cords, and inconvenient reaching. Some details still may need adjustment. A beautiful arrangement is not automatically a practical one.
| No. | Coffee Bar Idea | Recommended Space | Workflow and Storage Plan | Lighting Recommendation | Utility Access and Safety | Best Suited To |
|---|---|---|---|---|---|---|
| 1 | Compact Countertop Station | Allow approximately 60–90 cm of counter width and at least 45 cm of usable depth. | Keep the brewer in the center, cups beside it, and coffee tools in a shallow drawer or nearby container. | Use under-cabinet task lighting aimed at the preparation area. A target of about 300–500 lux is suitable for detailed tasks. | Place the appliance near a grounded outlet without using an extension cord across the work surface. Leave ventilation space around heated equipment. | Apartments, small kitchens, and renters who need a flexible setup. |
| 2 | Unused Corner Coffee Nook | A corner measuring roughly 90 × 60 cm can accommodate a narrow counter, shelf, and compact appliance. | Store frequently used items on the lower shelf and reserve the counter for brewing, filling, and serving. | Install a small wall light or adjustable task fixture so the corner does not become visually dark. | Confirm that an outlet is available on one wall before installing shelves. Keep water containers away from electrical connections. | Kitchens with dead corners or limited continuous counter space. |
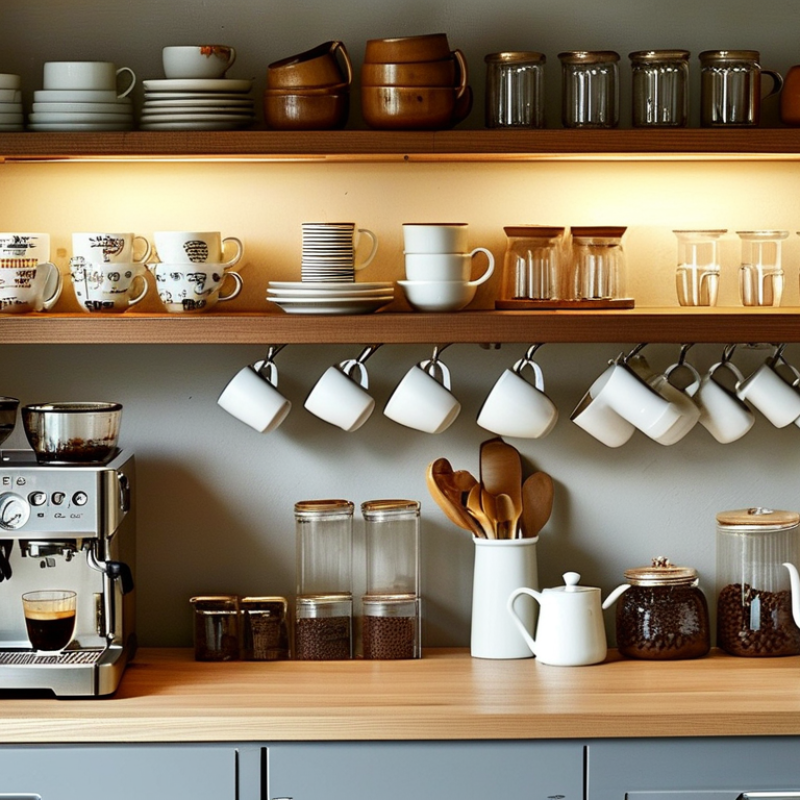
| 3 | Open Shelf Coffee Wall | Use a wall section about 75–120 cm wide, with shelves positioned above a clear counter. | Place mugs and dry ingredients on the middle shelf, while keeping heavier equipment on the counter or a lower shelf. | Add warm accent lighting under each shelf, while maintaining brighter task lighting directly over the counter. | Locate shelves away from the sink splash zone. Route appliance cords toward a nearby outlet rather than hanging them between shelves. | Kitchens that need vertical storage without adding a full cabinet run. |
| 4 | Breakfast Bar Coffee Station | Reserve about 90–120 cm of counter width near a seating area, with enough clearance for people to pass behind the user. | Keep serving items facing the seating side and brewing supplies on the working side to reduce unnecessary movement. | Use pendant or ceiling lighting for general illumination, supplemented by focused task lighting on the counter. | An outlet should be close to the appliance but positioned so cords do not cross the seating or walking path. | Open-plan kitchens where coffee preparation is part of the morning routine. |
| 5 | Coffee Cabinet with Appliance Garage | Plan for approximately 75–100 cm of cabinet width and a counter depth of about 60 cm. | Store the brewer at counter level, with filters, scoops, and cups in the adjacent drawers. Use a lift-up or roll-up door for concealment. | Fit internal or under-cabinet lighting so the appliance remains visible when the cabinet door is open. | Provide an outlet inside or at the rear of the cabinet, and allow heat and steam to escape before closing the door. | Organized kitchens where appliances should be hidden when not in use. |
| 6 | Coffee Bar by the Pantry | A 90–150 cm counter section near pantry storage provides room for brewing and ingredient organization. | Position beans, filters, and sweeteners between the pantry and brewer to create a logical storage-to-preparation sequence. | Use even overhead lighting plus under-cabinet task lighting to reduce shadows from upper cabinets. | Keep dry goods separated from the sink and verify that appliance use will not block the pantry door or main aisle. | Medium and large kitchens with dedicated food-storage zones. |
| 7 | Sink-Adjacent Coffee Prep Zone | Allow at least 60–90 cm of clear counter beside the sink for filling, rinsing, and placing a carafe. | Use the sink for water access and cleanup, but keep dry coffee supplies in a drawer or cabinet away from splashes. | Provide bright task lighting over the sink and counter. Diffused fixtures help reduce reflections on wet surfaces. | Keep electrical appliances outside the sink’s immediate splash area and maintain a clear separation between water and power connections. | Users who prioritize quick refilling and easy cleanup. |
| 8 | Rolling Coffee Cart | A cart approximately 45–60 cm wide and 35–50 cm deep can fit beside a cabinet or dining area. | Place lightweight supplies on upper shelves and heavier items low for stability. Lock the wheels during use. | Position the cart under existing room lighting or near a bright wall-mounted fixture without creating glare. | Move the cart close to an outlet before operating equipment. Avoid using it where the cord could become a trip hazard. | Renters, multipurpose rooms, and households that need a movable station. |
| 9 | Dedicated Beverage Drawer Zone | Use a 60–90 cm cabinet section with one clear counter area and two or three organized drawers. | Assign separate drawers for filters, utensils, mugs, and dry ingredients to make the preparation sequence predictable. | Install linear under-cabinet lighting across the full counter width so drawers and the work surface are evenly illuminated. | Keep the outlet accessible above or behind the counter, and avoid overloading a circuit with several high-wattage appliances. | Busy households that value fast preparation and uncluttered surfaces. |
| 10 | Full Coffee and Beverage Center | Plan for approximately 150–240 cm of counter width, about 60 cm of depth, and clear aisle space in front. | Divide the station into zones: dry storage, water access, brewing, serving, and cleanup. Keep the most-used items within easy reach. | Combine ambient lighting with 300–500 lux task lighting over the counter. Use separate controls for general and task fixtures. | Plan outlets according to the appliance layout, keep cords short and concealed, and provide ventilation for heat-producing equipment. | Large kitchens, entertaining areas, and households with multiple beverage appliances. |
Match One of 10 Coffee-Bar Layouts to Your Kitchen Size
A home coffee bar should fit your kitchen, not compete with it. The 2024 National Coffee Association report found that 67% of American adults drank coffee the previous day. That habit deserves a practical station, even in a small room.
Match your space to one of ten layouts: a wall shelf, narrow counter strip, rolling cart, pantry shelf, appliance garage, corner cabinet, breakfast nook, island end, full-height cabinet, or dedicated beverage wall.
A wall shelf suits kitchens with almost no spare counter space. Keep cups above and coffee tools below. A narrow counter strip needs only 45 to 60 centimetres of clear width. It works beside a refrigerator or sink.
A rolling cart adds flexibility, though its wheels may become annoying on uneven floors. I have learned this the hard way.
Medium kitchens can use a corner cabinet, pantry shelf, breakfast nook, or island end. Store daily equipment between waist and shoulder height. The National Kitchen and Bath Association’s planning guidance supports keeping frequent-use items accessible, reducing unnecessary bending. For larger kitchens, choose a full-height cabinet or beverage wall. Allow ventilation around heating equipment and protect wooden surfaces from steam. The Specialty Coffee Association emphasizes water quality and consistent brewing conditions, so include a refillable water container, a drainage solution, and space for a small scale.
Some layouts look beautiful but fail at cleanup. That matters more than symmetry.
Choose Equipment Using the SCA’s 195–205°F Brewing Standard
10 Best Home Coffee Bar Ideas for Every Kitchen
A useful home coffee bar starts with brewing control, not decoration. The Specialty Coffee Association recommends water between 195°F and 205°F for many brewed coffees. This range supports balanced extraction when grind size and contact time are suitable. Choose a kettle with accurate temperature control, or keep a reliable thermometer nearby. A stable brewer also matters. Thin plastic can lose heat quickly, especially near a cold window. A preheated ceramic dripper or insulated brewer may produce a steadier cup. I learned this after serving coffee that tasted sharp, even with fresh grounds.
Tips: Place the kettle, grinder, scale, and brewer within easy reach. Use a scale for repeatable recipes. Start with filtered water. Record small changes. Your favorite setting may need adjustment.
A compact bar can include a manual grinder, a gooseneck kettle, an adjustable brewer, and airtight storage. The grinder deserves attention because uneven particles create both bitterness and sourness. Set the kettle near the brewing area, but leave space for safe pouring. Measure water temperature before brewing, not only after heating. At high elevations, boiling occurs below 212°F, so the thermometer becomes more useful. Clean coffee oils from equipment regularly. I sometimes over-focus on exact numbers, though. The 195–205°F standard is a guide, not a promise of perfect flavor. Taste the cup, then adjust one variable at a time.
10 Best Home Coffee Bar Ideas for Every Kitchen
Choose equipment around the SCA brewing standard of 195–205°F (90.5–96.1°C), then match your coffee dose to the amount of water you brew.
1. Compact Brewer Station
Use a small manual brewer, a gooseneck kettle, and a digital scale for precise control in a narrow kitchen.
2. Dedicated Grinding Zone
Keep the grinder beside the brewer and store whole beans in an airtight, opaque container away from heat and light.
3. Batch Coffee Corner
A larger brewer and insulated carafe suit households that prepare several cups at once.
4. Organized Mug Storage
Place frequently used mugs below the brewing area and keep accessories together in one tray.
The chart uses a 55 grams-per-liter coffee-to-water ratio. Values are calculated for common home brewing volumes and rounded to the nearest half gram. Brew water should remain within the 195–205°F range.
Design Storage Around the SCA’s 1:15–1:18 Coffee-to-Water Ratio
10 Best Home Coffee Bar Ideas for Every Kitchen
A useful coffee bar starts with the cup, not the cabinet. The Specialty Coffee Association recommends about 1:15 to 1:18 coffee-to-water. That means 20 grams of coffee needs 300 to 360 grams of water. Store a scale beside the brewer, not inside a drawer. Small decisions improve consistency.
The 2024 National Coffee Data Trends report found that 67% of American adults drank coffee during the previous day. Many cups are prepared at home, so storage should support repeated brewing. Keep a sealed coffee container, kettle, scale, filters, and grinder within one arm’s reach. A narrow shelf can hold the essentials. Leave space for a digital timer and a waste bowl. Counters become chaotic quickly.
Water deserves its own place. SCA standards identify a preferred total dissolved solids range of 75–250 milligrams per liter, with balanced mineral content. Store filtered water in a clean, covered vessel near the bar. Avoid placing it beside heat or direct sunlight. I once kept water under an open shelf, and dust reached the lid. It was a small mistake, but useful feedback. Labeling doses near the scale can help, although handwritten notes may look less polished. That is acceptable. A coffee station should support accurate habits, not only attractive photographs.
Prioritize Cleaning and Safety for the NCA’s 67% Daily Coffee Drinkers
10 Best Home Coffee Bar Ideas for Every Kitchen?
The National Coffee Association’s Spring 2024 National Coffee Data Trends report found that 67% of U.S. adults drank coffee daily. That habit deserves a clean, safe station. Choose a washable tray, sealed bean storage, a wipeable counter, and a small waste container. Add a raised shelf for mugs, a dedicated water area, and clear space around hot equipment. A slim rolling cart, wall shelf, or corner cabinet can create the remaining three ideas without crowding the kitchen.
Cleanliness needs design, not good intentions. NSF International’s household germ study identified coffee-machine reservoirs as common areas for yeast and mold buildup. Empty the reservoir after use, rinse it daily, and follow the equipment maker’s cleaning instructions. Wash removable parts regularly. Dry them fully before reassembly. Damp corners stay dangerous.
Safety is quieter, but important. The U.S. Food and Drug Administration’s Food Code stresses cleanable surfaces, proper maintenance, and protection from contamination. Keep cords away from sinks, use a stable heat-resistant mat, and leave ventilation space around hot appliances. Never balance a machine on a narrow shelf. Small kitchens punish poor planning. I still overlook one detail sometimes: the underside of a drip tray. That hidden film can return quickly. A weekly flashlight check feels excessive, but it exposes what routine wiping misses.
Related Posts
-
Future Innovations Shaping the Home Coffee Bar Experience for Global Buyers
-
10 Best Robot Coffee Makers for Perfect Brews at Home?
-

What is Roasted Coffee and How Does It Affect Your Brew?
-

Discover the Ultimate Guide to Sourcing the Best Cups Barista from Top Quality Suppliers
-
The Science Behind Perfecting Your Barista Coffee Skills at Home
-

Trends in Robot Barista Technology for 2025 and Innovative Approaches to Optimize Coffee Services