


Top Wall Backsplash Materials for Modern Kitchens
A kitchen backsplash does more than protect paint from splashes; it shapes how the whole room feels. The right Wall Back Splash can brighten a narrow workspace, soften sharp cabinetry, or add texture behind a range. Small details matter. Grout lines, edge profiles, and reflections often become more noticeable once daily cooking begins.
Porcelain and ceramic tiles suit busy kitchens because they offer many colors and are generally easy to clean. Glass can reflect daylight and make a compact room feel more open, though fingerprints may show under strong lighting. Natural stone brings distinctive veining, but some varieties need sealing and gentle cleaners. Stainless steel and other metal finishes create a crisp, professional look; they can also reveal scratches. Large-format slabs reduce grout lines, yet handling and installation may require more planning and expense. Looks can mislead. A glossy sample under showroom lights may appear different beside your cabinets at home.
This guide compares popular backsplash materials through practical considerations: upkeep, durability, appearance, installation, and cost. Before choosing, check care instructions and confirm that the product suits the heat and moisture near your cooking area. Ask an experienced installer about wall condition, seams, and outlets, since these details can change the finished result. No surface is perfect for every kitchen. A material that feels timeless today may still demand more maintenance than you expected, so weigh its real-life care against its visual appeal.
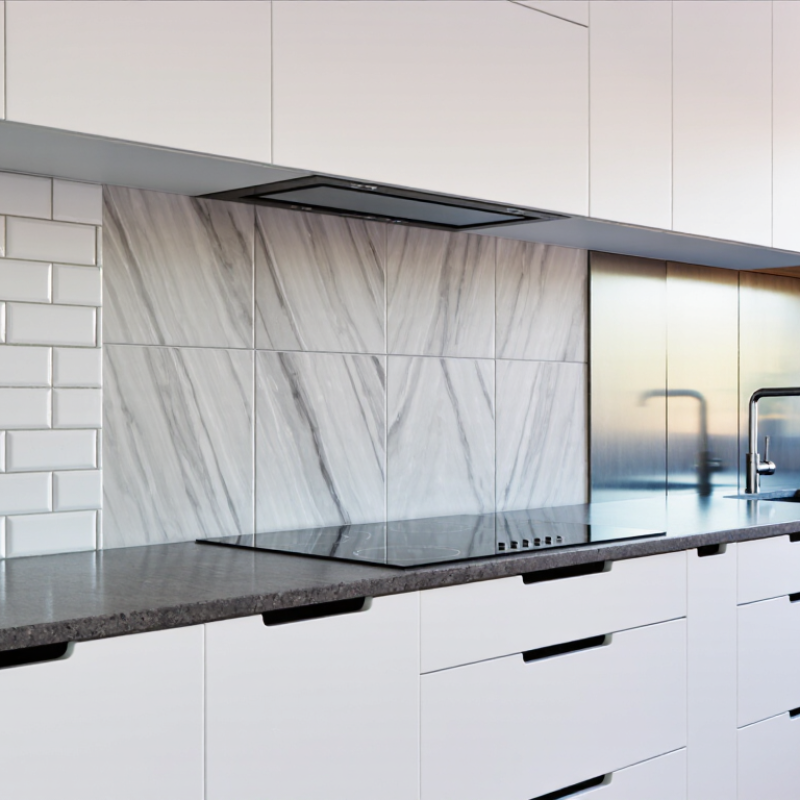
Define a Kitchen Backsplash by Its Function, Height, and Exposure to Moisture
A backsplash protects the wall, but its job changes with the cooking zone. Behind a sink, repeated splashes and cleaning matter most. Behind a range, choose a heat-suitable surface and follow the appliance’s clearance guidance. Porcelain tile and glass are easy to wipe; natural stone may need sealing. No surface is maintenance-free.
Let the backsplash height match real exposure, not habit alone. A short strip may suit a lightly used counter. At a sink or range, extending coverage to the cabinets or hood can protect more of the wall. For a full-height design, check outlet positions, cabinet edges, and transitions before ordering. Small details prevent awkward cuts and exposed gaps.
Moisture resistance depends on the whole assembly, not just the tile. Use grout suited to the location, seal porous stone when required, and keep the counter joint properly sealed. Water can seep through an unprotected edge and dampen the wall behind a durable-looking surface. A glossy finish looks crisp, but it can reveal every water mark. That trade-off is easy to underestimate.

Compare Ceramic, Porcelain, Glass, Stone, and Metal by Material Properties
Top Wall Backsplash Materials for Modern Kitchens
Ceramic and porcelain offer familiar tile formats, but their performance differs. The Tile Council of North America’s ANSI A137.1 standard defines porcelain tile by water absorption of 0.5% or less. That low absorption helps in splash zones, though grout joints still need routine cleaning. Ceramic is often more porous, depending on its body and glaze. Check the product’s technical sheet rather than judging by color or finish alone. A pale grout line can show every coffee splash.
Glass reflects light and wipes clean easily, but glossy surfaces reveal fingerprints and can show scratches under strong task lighting. Stone feels varied and tactile. The Natural Stone Institute’s Dimension Stone Design Manual notes that stone properties vary by type and source, so sealing needs are not universal. Marble may etch from acidic foods; granite is generally harder, but its finish and porosity still matter. Small details count.
Metal, commonly stainless steel, resists water and handles heat well, making it practical behind a range. It can, however, show smears and fine scratches. This is not a perfect material. Compare samples beside your actual countertop and under evening lighting; showroom lighting can mislead. For any material, confirm installation guidance, cleaning limits, and edge details with the manufacturer’s technical documentation before choosing.
Assess Porcelain Tile: ANSI A137.1 Sets Water Absorption at 0.5% or Less
For a modern kitchen backsplash, porcelain tile offers a measurable starting point: ANSI A137.1 sets water absorption at 0.5% or less by weight. The standard’s classification is based on laboratory testing, not a promise that every installed surface will resist stains or moisture equally. A useful benchmark. When comparing samples, check the technical sheet for the stated absorption rate and ask whether the tile meets ANSI A137.1. A polished sample may look nearly sealed, but appearance alone cannot confirm performance.
The Tile Council of North America’s Handbook for Ceramic, Glass, and Stone Tile Installation stresses that sound installation depends on appropriate setting materials and substrate preparation. That matters behind a sink, where splashes can collect around grout joints and the counter edge. Porcelain’s low absorption can limit water uptake into the tile body, yet grout, cut edges, and gaps still need careful detailing. Not a guarantee. Wipe a sample with coffee or cooking oil to see how its finish behaves, then confirm cleaning guidance with the supplier. I would not assume low absorption means zero maintenance; that distinction is easy to overlook.
Review Installation Standards: Substrates, Adhesives, Grout, and Sealing
Top Wall Backsplash Materials for Modern Kitchens
A backsplash only performs well when its layers work together. Start with a substrate that is flat, firm, clean, and fully dry. In a kitchen, suitable drywall may work in ordinary splash zones; cement board can be appropriate where the assembly needs greater moisture resistance. Follow the tile and setting-material instructions for the specific wall. Even a small ridge can make glossy tile look uneven under under-cabinet lighting.
Tips: Dry-lay a few rows and mark outlet openings before spreading adhesive. Choose thin-set or another approved adhesive to suit the tile, substrate, and exposure. Keep joints consistent, and use spacers rather than trusting your eye. Small gaps matter. Respect the stated curing time before grouting; rushing this step can weaken the installation.
Use grout sized for the joint and tile, then seal only when the grout or stone requires it. Many cement-based grouts benefit from sealing, while some products do not; check the technical instructions. Natural stone may need separate protection. At inside corners and the counter joint, flexible sealant is generally preferable to rigid grout because surfaces can move slightly. One detail is easy to underestimate: clean adhesive from joints while it is still workable. Scraping hardened residue later is tedious, and I would not assume every tile tolerates aggressive cleaning.
Top Wall Backsplash Materials for Modern Kitchens — Installation Standards Review
| Material | Suitable Substrate | Adhesive and Setting Notes | Grout and Joint Guidance | Sealing and Maintenance | Key Installation Checks |
|---|---|---|---|---|---|
| Glazed ceramic tile | Sound, clean, dry, and flat cement backer board or an appropriate interior wall surface. Use a suitable waterproofing system where the installation is exposed to frequent water. | Use a cementitious tile mortar compatible with the tile, substrate, and exposure conditions. Follow the mortar manufacturer’s instructions for mixing, open time, and coverage. | Use cementitious or epoxy grout compatible with the joint width and exposure. Select joint width based on tile size variation and the tile manufacturer’s guidance. | Glazed faces generally do not need sealing. Cement-based grout may benefit from a compatible penetrating sealer after curing; follow product instructions. | Check that the wall is flat and secure. Remove dust, grease, and loose paint. Protect movement joints and changes of plane with an appropriate flexible sealant rather than rigid grout. |
| Porcelain tile | Sound cement backer board or another approved, stable wall substrate. For areas with regular water exposure, use a compatible waterproofing assembly. | Use a mortar rated for the tile and substrate; a polymer-modified mortar is commonly used for porcelain. Follow the applicable product instructions and verify adequate mortar coverage. | Choose grout appropriate for the joint width and cleaning needs. For consistent joints, account for actual tile-size variation rather than relying only on nominal dimensions. | Porcelain tile usually does not require sealing. Cement-based grout may be sealed if its manufacturer recommends it; epoxy grout typically does not require a penetrating sealer. | Check tile backing and mortar compatibility. Confirm full support at edges and corners, and keep grout joints clear of excess setting material before grouting. |
| Natural stone | Rigid, flat cementitious backer board or another substrate approved for the stone and installation. Use a waterproofing system where required by the exposure. | Use a mortar approved for the specific stone. White mortar is commonly selected for light-colored or translucent stone to reduce the risk of discoloration; test a sample when staining is a concern. | Use a grout compatible with the stone’s porosity and surface finish. Test grout and cleaning methods on a sample to check for scratching, staining, or pigment absorption. | Sealing depends on the stone type and finish. A suitable penetrating sealer may be appropriate; test first and follow the stone and sealer manufacturers’ guidance. | Check for warping, shade variation, and sensitivity to moisture. Use non-staining materials where specified and avoid acidic cleaners on acid-sensitive stone such as marble or limestone. |
| Glass tile | Very flat, stable, and clean cementitious or otherwise manufacturer-approved substrate. Use a waterproofing system when required by the installation conditions. | Use a setting material specifically approved for the glass tile. White mortar is often specified to preserve color; follow the tile manufacturer’s instructions for trowel selection, coverage, and curing. | Use grout approved for glass tile and its joint width. Confirm compatibility with the tile finish and test the grout on a sample where scratching or staining is possible. | Glass faces generally do not need sealing. Seal cement-based grout only if appropriate for the grout and tile system; do not apply sealer to glass unless specifically directed. | Follow any special requirements for paper-faced or mesh-mounted mosaics. Check that the mortar color and substrate do not show through the glass, and avoid disturbing tiles during the specified cure period. |
| Metal tile or metal-faced mosaic | Flat, rigid, clean, and dry substrate approved by the tile manufacturer. Confirm that the substrate and setting materials suit the metal backing and the intended location. | Use only a compatible adhesive or mortar approved for the tile construction. Some metal-faced products require a specific adhesive rather than standard cement mortar. | Follow the product instructions for joint width and grout selection. Use non-abrasive application and cleaning methods to protect the metal finish. | Metal faces generally do not need tile sealer. Sealing, if needed, applies to compatible cement grout; use cleaning products approved for the metal finish. | Check for protective films, directional patterns, and finish sensitivity before installation. Make a sample panel to verify appearance and cleaning methods. |
General installation note: Confirm the tile, mortar, grout, substrate, and waterproofing instructions as one compatible system. Prepare the wall to the applicable local code and current industry standards. Grout-joint width should account for actual tile-size variation and applicable installation guidance; movement joints should remain free of rigid grout.
Choose a Material by Cleaning Needs, Heat Exposure, Durability, and Cost
Top Wall Backsplash Materials for Modern Kitchens
Cleaning needs should shape the choice as much as appearance. Smooth porcelain, glass, and large-format panels have fewer grout lines, so grease wipes away more easily. Ceramic tile is often budget-friendly, but grout can darken near a busy cooktop.
Houzz’s 2024 U.S. Kitchen Trends Study found that 86% of renovating homeowners updated their backsplash, showing how often this surface becomes part of a kitchen refresh.
Not every finish suits every cook.
Heat exposure matters. Porcelain and many ceramic tiles handle the wall behind a range well when installed with suitable adhesive and grout. Natural stone brings texture, but may need sealing and prompt cleanup after oil or acidic spills. Quartz slabs offer fewer seams, though resin-based products can be sensitive to intense heat; check the product’s installation guidance before placing one near a range.
Cost varies with material, fabrication, and labor. A simple tile may cost less upfront, while slab surfaces can reduce grout maintenance but raise installation costs.
Tips:
Ask an installer about heat clearance, grout type, and sealing before buying. View samples beside your actual countertop and under kitchen lighting.
Small detail. Big difference.
I still find grout upkeep easy to underestimate, especially in homes where dinner is cooked nightly.


